

Enabling customers to effortlessly submit support requests through a company’s website not only enhances customer satisfaction but also significantly boosts the efficiency of support teams. The Web-to-Case feature is a pivotal tool in achieving this, providing a direct channel for customers to raise queries or issues, which, in turn, allows support teams to respond more swiftly.
Web to Case is an innovative approach allowing customers to submit cases via a simple, unauthenticated form on your website, seamlessly integrating into your Salesforce.com ecosystem. This feature empowers organizations to maintain their brand identity while facilitating customer case submissions directly into Salesforce. By generating a snippet of HTML code that can be embedded on any webpage, Web to Case simplifies the process of creating a branded, accessible support form.
Upon submission, these forms directly funnel information into the Salesforce org, where they are automatically routed to the appropriate support teams based on predefined criteria, streamlining case management and enhancing response times.
Key Benefits:
Web-to-Case enables the automation of up to 5,000 new cases daily, offering a straightforward way for customers to log their issues. Through the automated assignment of cases to relevant teams, support representatives are freed from manual entry tasks, allowing them to dedicate more time to resolving customer issues. The simplicity of setting up a Web to Case form, combined with the flexibility of HTML customization, makes it an invaluable tool for enhancing support operations.
Prerequisites:
Required editions: Salesforce Classic (availability may vary) and Lightning Experience.
Availability: Essential, Professional, Enterprise, Performance, Unlimited, and Developer Editions.
Further Insights: Explore the Benefits of Salesforce Einstein Bot Configuration!.
Configuration Steps:
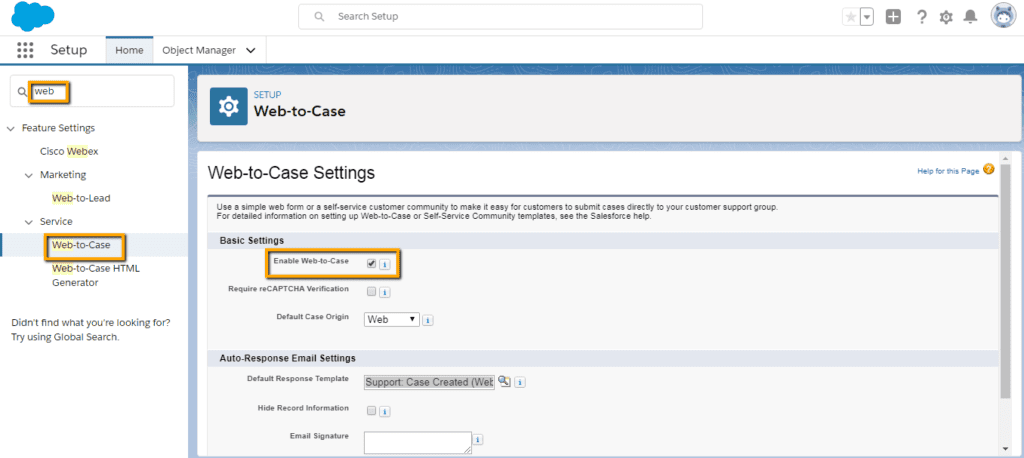
In Setup, search for Web-to-Case using the Quick Find box, then select Web-to-Case.
Activate Web-to-Case and consider enabling reCAPTCHA Verification to minimize spam, ensuring all submissions are verified for authenticity.
Define a default case origin and an automatic response template to notify customers of case creation, enhancing communication and transparency.
If desired, choose to hide record information in customer emails for failed case creations and customize the email signature.
Creating a Web-to-Case Form:
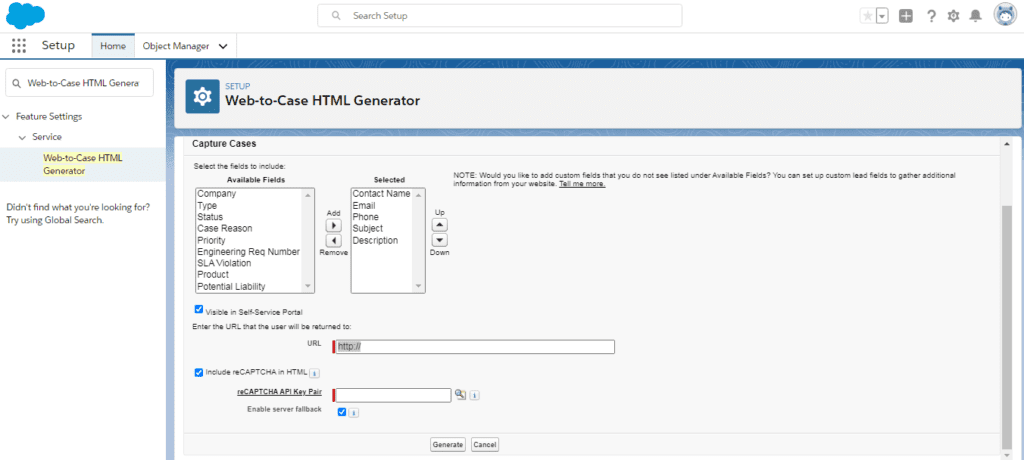
Using the Web-to-Case HTML Generator found in Setup, select the fields you wish to include in your form.
Customize field selection and order, and specify a redirect URL for post-submission.
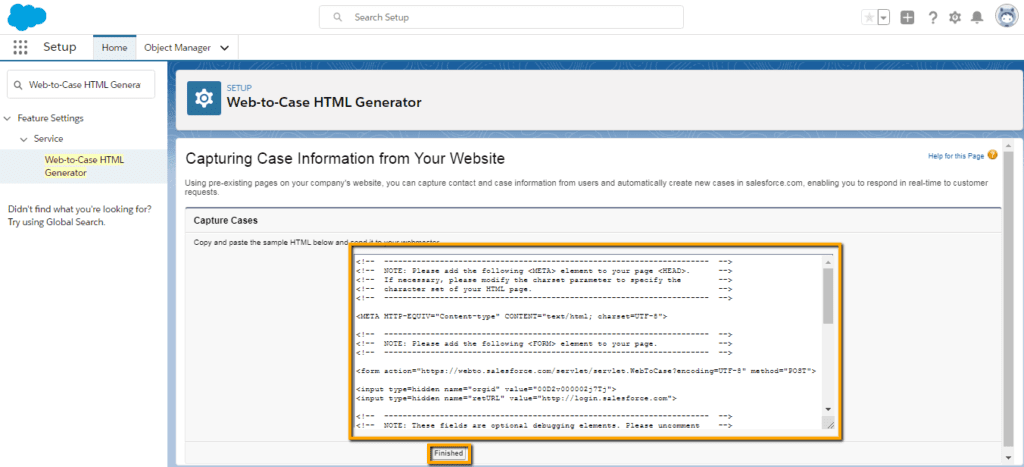
Generate and implement the HTML code on your website, providing customers with direct access to submit cases.
Setting Up Case Assignment and Queues:
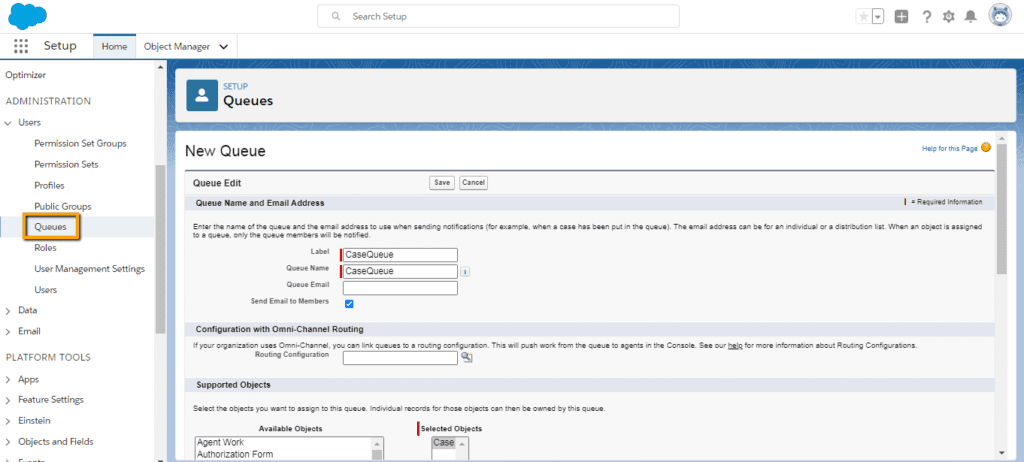
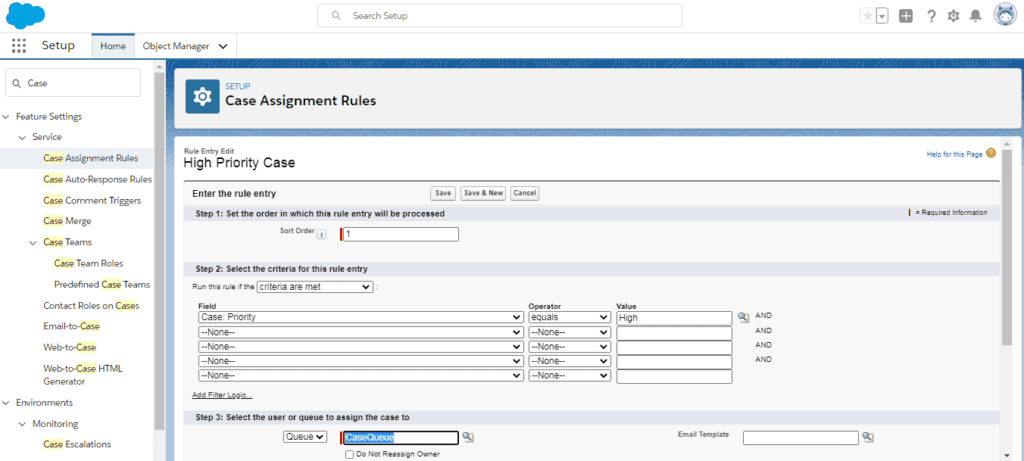
Create a queue for case assignments in Setup by defining the queue’s name, notification preferences, and members.
Establish Case Assignment Rules by specifying criteria such as case priority, ensuring high-priority cases are directed to the appropriate queue for swift action.
Why Choose Web to Case Over Zendesk:
Create a queue for case assignments in Setup by defining the queue’s name, notification preferences, and members.
Establish Case Assignment Rules by specifying criteria such as case priority, ensuring high-priority cases are directed to the appropriate queue for swift action.
Conclusion:
Salesforce’s Web-to-Case feature streamlines the capture of customer support issues directly into CRM software, saving significant time and effort for support teams. By structuring incoming case information, it simplifies issue assessment and resolution processes. As an integral Salesforce functionality, Web to Case is highly favored by organizations aiming to optimize their support operations and improve customer satisfaction. Contact us through form below for more details.
Related posts:
- Elevating Service & Support Excellence: Proven Approaches to Enhance Customer Satisfaction
- Most Common Salesforce Integration Challenges
- Maximizing Sales Potential: Integrating LinkedIn with Salesforce for Seamless Customer Relationship Management
- Ticket Sync Package: Key to Salesforce and Zendesk Integration